5 Tips for Growing Plants Successfully in the Classroom.
Growing plants in the classroom can be tricky. Each classroom is different. Use these tips to improve germination and plant growth.
If you are in a new classroom or new to growing plants we recommend testing the different methods to discover what works best in your classroom. You can use the data for future classes. These tips also work great for starting garden seeds indoors.
If you are in a new classroom or new to growing plants we recommend testing the different methods to discover what works best in your classroom. You can use the data for future classes. These tips also work great for starting garden seeds indoors.

1. Get enough sunlight.
 If a seed does not get enough sun the soil will not warm-up and the seed may take a long time to germinate, if at all. This can be very frustrating.
 If the plant does not get enough light it will have tall, spindly growth and be more pale yellow.
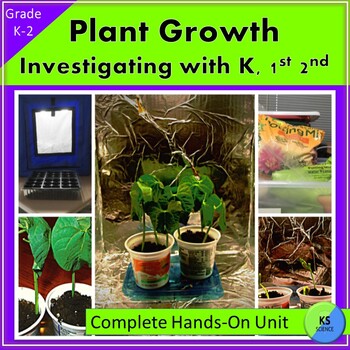
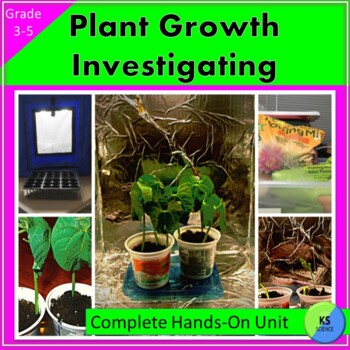
Plants do not do well with just incandescent lights. They do not supply enough intensity. Fluorescents are used for indoor gardens. Plants need both blue and red light. You can use Fluorescents with an incandescent to help plants get both. Many purchase a light kit for their classrooms. We like to make a light hut or use a store-bought one. Use a 13-watt fluorescent to have the best results.
Learn how to make a light hut. Your seeds will germinate very quickly and have good growth.
You may have enough windows, but do they face the right direction. South and west-facing windows are best. Plants need 14-16 hours of light a day. It is recommended they be within 12 inches of the light source. Sometimes that dries them out. Test and see.
2. Seeds need warmth to germinate.
 Plants need warmth. I worked in classrooms with one window and they were warmer. The seeds germinated well. A grow light or putting the plants on the windowsill worked well.
 The other classrooms had a wall of windows. The rooms lost all their heat at night and the seeds did not germinate well or at all. To solve that problem I bought heat mats. The plants had plenty of sun. They are inexpensive and worked well.
A light hut will also provide light and heat to help seeds germinate. The light hut is covered with foil. This allows light to reflect back onto the soil. Water the plants with warm water, not cold.
3. Use the right container and create drainage.
Small yogurt containers, plastic cups, Styrofoam cups, or black plant containers work well. You need to create holes at the bottom. For the plastic containers take a thumbtack or needle and heat it in a candle flame. The needle will poke right through the plastic. Make about 5 -6 holes. This will allow some water to drip out. It is also a good idea to place some gravel in the bottom to help with drainage. If you get poor drainage your plants may get mildew or mold.

4. Make sure they get the right amount of humidity and water.
Set up a careful watering schedule. You may need to spray water on them to keep them moist. The lights can be very drying. When planting the seeds add a little bit of water. Place plastic wrap over the top. This will create a mini greenhouse. Keep the plastic wrap on until the seeds sprout. No need to water. Once they have sprouted remove the plastic wrap and start a watering schedule.

5. Use the correct soil.
Plants under lights grow fast and need more nutrients. I have used peat moss with good results, but not under my light hut. The light hut provides light 24 hours a day. Peat moss will dry out too quickly. Use good potting soil. Peat moss is fantastic when you are placing plastic wrap over the top of the container for sprouting. If you are using good soil you shouldn't have to fertilize for the length of time you grow plants in the classroom. If you are growing them longer than two weeks the students may want to try adding some plant food. Peat moss will not have enough nutrients.
Don't' be afraid to try growing plants in the classroom. Whether they grow well or not it will be a learning experience. Each year will be different, but you have to start somewhere. Don't spend a lot of money on expensive plant garden products. Use these tips and you should have better success.
Consider putting the plants on a movable cart. That way if the spot doesn't seem to work you can move them to the best sunlight and warmth.
LEARN MORE

SHOP THIS POST

EXPAND FURTHER

