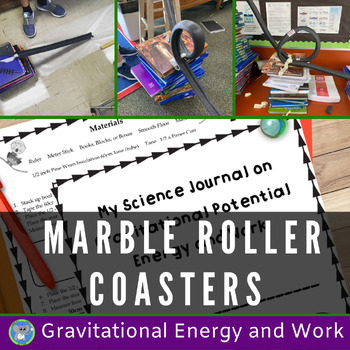
3 Creative Ways To Make Marble Roller Coasters In The Classroom
Creating marble roller coasters in the classroom has always been a favorite of students. It is memorable and allows for creativity. A great example of play and learning combined. It is an event so make sure to provide enough building time.

There are several types of roller coasters you can build in the classroom. All have their pros and cons and all are super fun.
Watch the complete video for more details.
1. Pipe Insulation Roller Coasters

What are they? 1/2 inch foam pipe insulation. We don't usually use bigger because it makes it harder to bend them. The marble fits perfectly inside.
Where do I find them? Go to your local hardware store or chain. One 1/2 inch 6-foot tube is about $1.50. That will give you two tubes. Each group may only need 3 sections or 1 1/2 tubes.
Pros: These are fabulous and the tubing can be used over and over. You get 2 tubes in each one. You just split the tube in half. They bend well and can be cut easily. They are great for loops. They are also great after the activity for indoor recess fun. Easy prep and easy clean-up. Just pass out the supplies and they are ready to start building.
Cons: The biggest con is that it is hard to attach them together. Have lots of duck tape or glue dots on hand. You also need to come up with a way for them to stay up. We use tables, chairs, paper towel tubes, and books. We have also attached them to walls. They do take up more class space.
Alternatives: You can use pool noodles. Depending on thickness they may not bend well. We find they are more expensive.
2. Paper Roller Coasters

What are they? Templates that are printed on cardstock paper. Students cut slits in them to make them bend and twist. You also use uncut cardstock paper as supports.
Where do I find them? You can purchase or find free download templates online. Head to Science Buddies for a great description and templates.
Pros: The tubes can be cut and reshaped easily. The paper supports height can be modified with just scissors. Inexpensive since you just need to print. The roller coasters can be very intricate. Students can build on a table or desktop. Much more space-saving.
Cons: There is more prep for the teacher and students. Students need to cut each piece and adjust it with tape. You will need more class time. These are better for older students with good fine motor skills. Have lots of clear tape. They also can crush easily.
3. Paper Plate and Cardboard Tube Roller Coasters

What are they? These are roller coasters made from cut paper plates and cardboard tubes like paper towel rolls. You use the raised edge of the paper plates.
Where do I find them? You can get paper plates at the store. The dollar store is a great place to start. Make sure the plates are sturdy and have a good raised edge. The cardboard tubes will have to be collected by families to donate.
Pros: The supplies are cheap and clean-up is simple. Paper can be cut easily. The tubes are sturdy. You can cut slits and tunnels in the tubes to support the paper plate runs. One site suggested using glue dots to hold things together. We are going to try that!
Cons: This would be harder for younger students. You need good fine motor skills. There is more prep involved for the students with cutting. More class time will be needed.
We found this video by StickCaps that shows a great marble run. Look closely at how they attached the plates to the cardboard tubes. So creative!
Have fun building marble roller coasters with your students. You can even combine all 3 types to see what the students like the best. They are great for a makerspace.
SHOP THIS POST
EXPLORE FURTHER